Friday 9 December 2016

Character & Narrative- Evaluation

Character & Narrative

Evaluation

Throughout this module, I have come across constant experimentations and difficulties. As this is the first stop-motion Have ever done of any kind, many of the pre-production, production and post production was all new territory that needed researching and looking into to do most of the stages. This would include building the armatures, constructing the set and props, as well as learning how to use DragonFrame and Premier. 

Workload for this project was like no other project I have done in the past. This was because it needed a lot more planning and hands on manufacturing. Compared to in the past when I needed to build the character sheets and turn arounds, this then needed me to go ahead and make them. At some points I did fall behind on the workload as it seemed very daunting at times. This was from the transition of completing the character sheets, to getting all of the materials and figuring out where to start. Although I did find that once started, it was hard to put it all down and stop. This is why I think I will try to do more stop-motion but making the amendments I have found with this project. After finishing this project, I found the workload to be a lot, but if I keep up with it, its not as daunting overall.

When looking at the end piece, I am actually very proud to see the animation I have created. Like all of the work I create, I do look at it with the mindset of a critique. This means I can see mistakes and all of the places I would have improved if I were to do it again. As a stop-motion, I do think it is successful as the characters really do come to life and seem to have a personality and emotion, even without mouths or moving faces. In the future I will defiantly use this again but now I have the experience to see what is expected and where the improvements are needing to be made and which aspects would need more of my attention.

I think certain problems affected the workflow. One would be sculpting on the models or even making removable faces with expressions. This is because stop-motion is really about showing expression. As I wasn't confident enough to sculpt and change the faces on the heads this time, from what I have learnt, I do think I would be able to do it in the future taking more inspiration from the look of Aardman characters and how their expression is shown. That is why I found the Research posts to be very useful as it made me see stop-motion in a way I had never thought of before and how it has many different positives and negatives about it within the industry. As the mouths couldn't be added the way I built the models, it was why I was going to animate them digitally in the editing stages on top of the images. This was when I found them to not work as it seemed to flash and really didn't work for what I was trying to achieve. I've spoken about this on my blog, but i felt that adding the mouths would distract too much with the flashing so I tool an executive decision not to use them which the audience may like or they may not, yet I hope the body language created from the puppets alone will be enough so it may have been a risky decision.

Another problem would be that I made the set too thick for the magnets to have an effect. This is an easy problem to fix in the future but it is something I had not considered until it was too late which was a bad move on my part, but therefore easily amended for next time. Another way to fix a problem I was having was getting the characters to stand. This really effected the way I filmed, how the characters moved and the limitations of how the walk cycles could be done. If you watch the animation, I couldn't have the models doing proper walk cycles as they wouldn't stand if only one leg was on the ground, even with me trying for a long period of time using lots of Dowling. In the future, I hope to create an armature that can stand one one leg at a time because it would make them come to life it they could move properly and not shuffle as that, if anything, distracts the viewer from the other smaller movements they could be missing. One thing that could have been a problem that was avoided, was that the armatures could have snapped. This would have set me back a fair bit as I would have to find a way to reattach the said snapped piece, or build a whole new model depending on how bad it broke.

Overall looking at the what the animation turned out like and the hours spent going into creating all of my props, all of the elements to my characters and even the clothing, I am immensely proud of what has been accomplished throughout these 10 weeks. There were many mistakes made but it all aided into creating a piece that I didn't even think I could have done at the beginning of this academic year. The mistakes were things that I had not seen coming when in planning. This has made me progress as an animator to think of every stage and plan how they could be done before the issue could arise. This gives time for it to be researched or avoided so time is not wasted. Although if I had not made mistakes, I don't think I would have learnt any where near as much as I feel I have learnt and taken from this project. Knowing how to make simple models, building a set, getting a greater understanding of Premier and more tool that are in Photoshop that I didn't know could be used when animating. 


Thursday 8 December 2016

Character & Narrative- Week 10 -Filming the Stop Motion & Final Week

Week 10 -Filming the Stop Motion & Final Week

As I had already started filming, when I came in for this final week everything was set up and ready to go. This meant the full day could be put to use. Here is an image from filming which is the scene just before he gives her the rose. Its been really hard for the male character as he is the one that cannot stand properly but the female is much easier and stands rather easily.
This is an image I tool when I did the first scene that had to be done at the end. This was becuase I would have to cut the male in half to show him coming out of the grave. This is the hole the hand will be coming out of, as well as his torso. This is before I painted the inside black so no white could be seen and it will look deeper.

I also needed to cut the arm of the male character as it falls off in the final scene. This meant for me to do the first scene, I had to wait for the moment it falls off near the end. As the inside is just a metal frame it meant it wasn't hard to cut and turned out much easier than I was imagining it would.
This is what he looks like coming out of the grave. Again it was easier than I thought as I was thinking it would be difficult to place him and work out all of the movements but it was fun to film and get going with.

Filming

This is the final image of the couple after his arm had fallen off, I had glued it back on and then they hold hands. It has been a really fun experience but there is much I would change within it all doing it again. Like working out spacing and making smaller movements so it isn't as quick and jerky.

As I could only see certain scenes when filming, I couldn't see the overall end sequence until I composited them all together at the end. This meant it was exiting to see it all come together at the end. When filming one of the last scenes I did make a mistake. I left the overhead light on, therefore making the light setup redundant. This can be seen in the test shot below but it meant that when bringing it through to Premier, changing the lighting could be done in there so I didn't have to worry all that much but i'm not very confident with Premier so it will be another challenge.

Tests

I did tests for all of the scenes so i could see which bits moved too quick and which scenes weren't as long as they should be to make sense and have the audience understand. I did this by simply bringing all of the image sequences for certain scenes, into Quicktime so it could quickly play them through and I could see which scenes needed changing. Here is one below that shows the lighting change and issue, as well as backgrounds that needed editing to make black and it going too quick.

This shows where the lighting needs changing in this test shot.
This is the full scene showing where the light changes and needs changing and where it goes too quick.

Premier

In Premier I composited all of the clips together and pulled them together into one tapered strip that showed me how long it was going to be, which is 33 seconds. After doing this I needed to change lighting. Here in the image below you can see where lighting has been added in effects as well as me changing the way some  scenes changed as my tutor didn't like the black that I was doing so he suggested fading from the scenes. This made it look like a quick time-laps so it looks like the character has been stuck in him grave trying to get out for quite a while. 

Premier was a lot easier to use than I thought as it was quick and easy to add in add of the scenes, as well as changing the brightness and contrast which you just drag into place and change with percentages of which one needs changing. This meant I could then pull it all into Photoshop to add the mouths in and experiment on what works as i'm still open to different changes.

Photoshop

One of the things still needed to be edited on the animation is the faces, since the beginning i've intended to put mouths on the characters. This and making sure all of the backgrounds are fully black. Yet since starting, I'm really not liking how it looks. As i am used to working digitally you can see the frames and build them where you want, but as its on images, the mouth seems to flicker and draws too much attention from the audience. This wouldn't work as I want the body movements and narrative to be the centre of attention. This is when I opted to leave them off. I like how they look without mouths but this was a big change from what i've been working towards so I will go ahead and make all of the other changes and see what it looks like at the end but i think it will still work.
Before moving on and adding the sound I just have to go over a few scenes and make them fully black becuase in some frames you can see the greyish walls which doesn't look right.

This didn't take too long becuase when editing in Premier, i adjusted the lighting so this really helped make the background and foreground seem separate. This is what I was trying to aim for as it draws the audiences attention to the foreground only.

Sound


For sound, I went to BenSound as I was told about this site being very useful and certain festivals like MAF use them for their background sounds. On the site there were two main songs that I really liked. One more suspenseful but the other more jaunty. I didn't think i would like it for this type of narrative but it actually really works. The pauses and different sounds go perfectly for what is going on within the animation which i'm very happy about as I always struggle finding music.

Final Animation


This is my final Stop-motion animation showing where the spacing has been changed and extended where needed, the jaunty music that perfectly fits with what is happening making the animation more charming and where the lighting has been changed. Even though there are no mouths I feel it doesn't matter as the body language shows enough of what is happening and feeling without having overly expressive faces. Like Gromit, it isn't needed to get across the feelings and thoughts of what is going on.

Wednesday 7 December 2016

Character & Narrative- Study Task 5 - Strike a Pose

Study Task 5 - 

Strike a Pose

Being able to convay emotion and narrative within animation is incredibly important. This is why this task was set as behind every character there is an animator who must understand the movements and emotions they are trying to convay.

As I am not an actor and really struggle with using myself as a model, which is why on every project I use someone else, but this let me try and use myself to show emotions using Moom. I do think i've vastly improved since last year when I couldn't even make him do a walk cycle. Since doing this I really hope to use Maya in the future on other animations, as the 3D element really adds to making an animation look more industry standard.

Here are the emotions i've chosen and the end result with the image of me as the reference.

Hunger


Awe


Pride


Envy


Surprise

Surprise ended up being the one I changed the most from the reference as I didn't feel I was exaggerating the movement enough to i've stretched the character so its more cartoon like yet able to show the emotion and impact.

Overall I really want to use this in the future as it wasn't as difficult as i remembered but I would want to improve on lighting and background as i'm still not sure how to use the tools correctly so I did as best as possible.


Monday 5 December 2016

Character & Narrative- Week 9- Setting Up the Set and Lighting

Week 9- 

Setting Up the Set, Lighting & Starting to Animate

 Since the elements were finished for my set, all i needed to do was transport it to university. The set up took way longer than expected. It wasn't the tree or headstones or any of the gluing, but the lighting and camera as I didn't know what I was doing so it was all an experiment to try and create enough light for the camera to pick up and the audience understand what was happening and the surroundings.

Here on the right is the tree Belle will be hiding behind. I love how this corner turned out and I am so proud of how the whole thing looks now its all come together.

For the moss and small shrubbery, I was painting cut up sponges in different shades of green and gluing them in different places around the set. This helped the overall look as it came to life as well as not looking so flat and lonely.

Here are the couples headstones next to each other. As you can see the way i have placed them, they look aged and old as they dont stand straight, this adds to the story as it looks like they must have been dead for a while as the tombstones have aged too.

This is also a wider shot showing how I set up the next headstone to also look aged. This helps with what I have been trying to achieve, which is that this section of the graveyard is more abandoned and secluded as everything is old. This placement also adds levels and different camera angles I could do without it looking linear and flat.


 Here are some more angles showing the rest of the scene as a whole. It really came to life when starting to add the different elements all together. It really calmed me as I knew that I could soon start filming and get going with the stop-motion which was exiting.


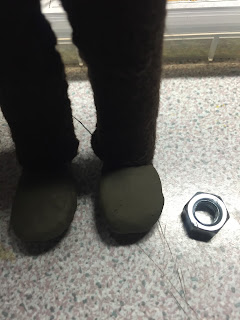
 Finally finding some bolts, I have been able to add them to the males feet. This was to create a magnetic effect and keep him standing but there was an issue. The set created is too think so even with strong magents it cannot go though the Polystirene. This means I will have to use some initiative and the male wont stand without some supports. This is when I created some dowels so i can stick him into certain spots and keep him from falling over.
 Here were two lighting tests. Setting up lighting took hours to do as it needs to be dark but not so much so the audience cant understand what is happening. This is when my tutor told me that I can darken it in Premier and After Effects after so this let me move on.
 When enquiring about the background and what should be done now that he has seen the set, he said that he doesn't think it even needs one. This made me look at the way it is set up and as it is night, the way the background is so black, it keeps the eye of the audience on the characters and looks more atmospheric. I've been worrying about this since the beginning so it was a big weight off my shoulders as I now only need to edit the animation background to make it darker if it doesn't look solid black which is a lot easier than creating a whole other scene.
 Here I am nearly ready to get started with the first scene. This is image is with the over head lights from the room on.
 This is when they are off. As you can see the two lights are helping to bounce enough light around the set without it being too overpowering and busy with light.

 This is the character as I have been moving him around the set. I wont be able to get much done today as its taken too much time sorting out the lighting but it has been amazing to see the result of small movements all coming together in DragonFrame. The software was complicated when I started but once everything is set up, you can just press a button and take the image through the camera.
Here is a quick test that i did once I got started which let me see how he was moving. I could see it was going too quick so after this point I really slowed the movements down and let myself take my time with it and there was no need to rush.
Here is what I have so far. It isn't much but i'm still very proud of the result. He has really come to life and the body movements show he is looking for someone so I hope by the end to have the audience understand what is happening and why he found the flower.


Saturday 3 December 2016

Character & Narrative- Week 9- Finishing Details + Script and Filming

Week 9- 

Finishing Details, Script and Filming

The script is something I have been meaning to do since the beginning. It will be very useful to follow alongside the anamatic and final editing as I can keep up with what sounds should go where and where the camera needs to be when filming at all times, and as it is a stop motion, knowing where the camera needs to be is extremely important. 

As you can see by this point as i have more faith in the characters I have built and sculpted, I am using the original story. At the beginning I switched the characters around as the faith in making a male character faulted me as I find them harder to draw so I didn't know what to expect when it came to building them. As to my surprise, he turned out looking great so the faith in my original cut of the animation makes it easier to go froward as the anamatic wouldn't need to be changed, taking up more time I dont have.

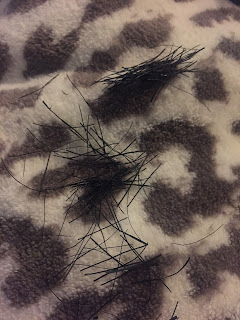
This is the material that seemed the best for the characters i'm building, its raw enough to not look plastic like some hair extension hair can look but I feel it also goes with the feel and aesthetic of what I have been building. As the female Belle, already has blonde hair it doesn't need changing for her but for him, his hair is black. I hand dyed each strand so they would still look to be the same material as the females hair. This was when I then cut the hair to short lengths so when glued onto his head, it would look short and cover his head well. I will also be attempting to give his a Quiff design so it will need experimenting with.


I start out adding the hair in small chunks to the back of his head and working round to get an even coverage, as well as making sure its the correct length at the base. To make sure it is securely attached UHU glue was a good adhesive as it also set quicker than PVA so the hair didn't have chance too move around much before it dried enough to hold.

After adding a few more layers around the back and sides to make sure his head couldn't be seen too much, the fringe needed to be done. As he is from the Victorian times, I wanted to do an older hairstyle. When designing the male character, He really suited a quiff style greaser hair do. This was not has hard as a first thought as i knew i needed to glue each strand in small sections so they all met the scalp and could be glued back. After attaching them to the scalp and letting it dry slightly, I grabbed all of the strands and pulled them back into the desired quiff and glued in place. This worked out a lot better as it dried quickly so stayed in place to get the look from below.


It was just before this stage when I thought about his eyes, as they weren't working out quite like the females, I decided to make one of his mirror hers and be all bloody as it further ties them together yet still in keeping with the opposites attract as they are a couple much alike yet one is a zombie but the other came back as a skeleton. This also lets me show most of the love they share in the body language I will be creating but also in the mouths added in the final stages if the emotions dont come across enough.

I chose not to add mouths as i didn't want to ruin the face through constant change but i hope to have enough time in the editing stages at the end to add them in, or at least show emotion through their movements.

This is his face with all of the wounds and finished eye, just as this is the final female face below.


Doing the females hair was harder than the males becuase of the way she is designed. I hadn't thought about this aspect of the pre-production as there were so many other things to get done beforehand but since she had curls and waves, I found i couldn't achieve this with the materials that I had. As the thin straw wasn't in lengths like assumed, it was in various pieces and strands so I couldn't grab chunks so I had to try and cut the curves in which hasn't really worked but i'm still happy with how she's turned out as, apart from the hair she's turned out to look quite similar to her design.


After having word with peers and my tutor about the issue with the background not working as the ground is too flat, I have carved the side and edges so they look more to be at the peak of a hill. On the lower left is the paste created to give texture to the scene. It was a mix of water, PVA, brown and black paint and salt for the grainy texture.

Since it is an outside set, texture is very important which is why I tried hard to get the headstones to look like textures concrete as it submerges the audience more than if it was squeaky clean and not as accurate.

This is what the texture looks like as well as the slowly sloping hill side looks like. I feel it really makes the characters look like they have their own section of the graveyard secluded from the bulk of the rest of the graves.


While the set was still wet from adding the textured mixture over all of it, I added the grass slowly in patches and following the path down the middle and off to the side.


This is also a change made to the set, as the path was said to go too much down the centre to the background would need to show where it was going, so i've added a small corner on the left so it curves round the upper level on the right so it looks like the path goes round and down the other side.
These are the patches i've added grass to so it breaks up the set but also brings it to life a great deal.


 These are the finished bases of the set before all of the headstones, moss and tree is added. This is the wet and dry images so you can see the distinct differences as the dry set looks a lot softer and less shiny as well as the grass blending in more.
These are the finished headstones with text and string added. I love how the older headstone turned out with the string tying the top to the bottom as it looks the most realistic and unique. These are all ready to attach to the base once I transport the set to university safely.

I've left the hands till the very end as i thought they would be the hardest things to do and i wasn't wrong, although they didn't take all that long they were still the smallest and most dainty things to try and do. These show how I added the fingers first then covered the base with plasticine before smoothing the plasticine from the fingers into the base.


I didn't think they looked skeleton enough so i painted the bones in black so the individual finger bones could be distinguished. Although i wish the black wasn't as bold i'm glad the females hands are out of the way.

Then came the males which were easier as they were all one colour, yet i'm not happy with these either as they turned out very large and chunky which I didn't want but i'm still glad that the puppets are finished, all apart from the males feet with just need bolts and plasticine to finish them off.

For the flower the male needs to give to the female, I bought a packet of  fabric roses that only came in creme. This meant i could experiment with the colour and effect that i wanted the rose to have. I was practicing between all red, splattered red or washed out red like it was covered in old blood as the female has been shot to this would create a good link and also show that the rose is hers for him to give back.
I chose the slightly faded rose as it needed that link to the female. I then got some of the thinker wire used for the characters frames and dipped it in brown paint. After it dried I cut it and stuck it into the rose so the male can pick it up and hold it, without it falling apart.

After all of these, I now just need to transport it all to university and get it all set up in order to start the stop motion filming. I have been told by another peer doing a stop motion that it takes time to set up so i have dedicated a whole day to setting up all of the set together as well as finding the right lighting for the atmosphere and trying to get it all working as i've never done anything like this before so its daunting but also exiting to get going.