Week 8-
More Clothing & Set Design
Clothing
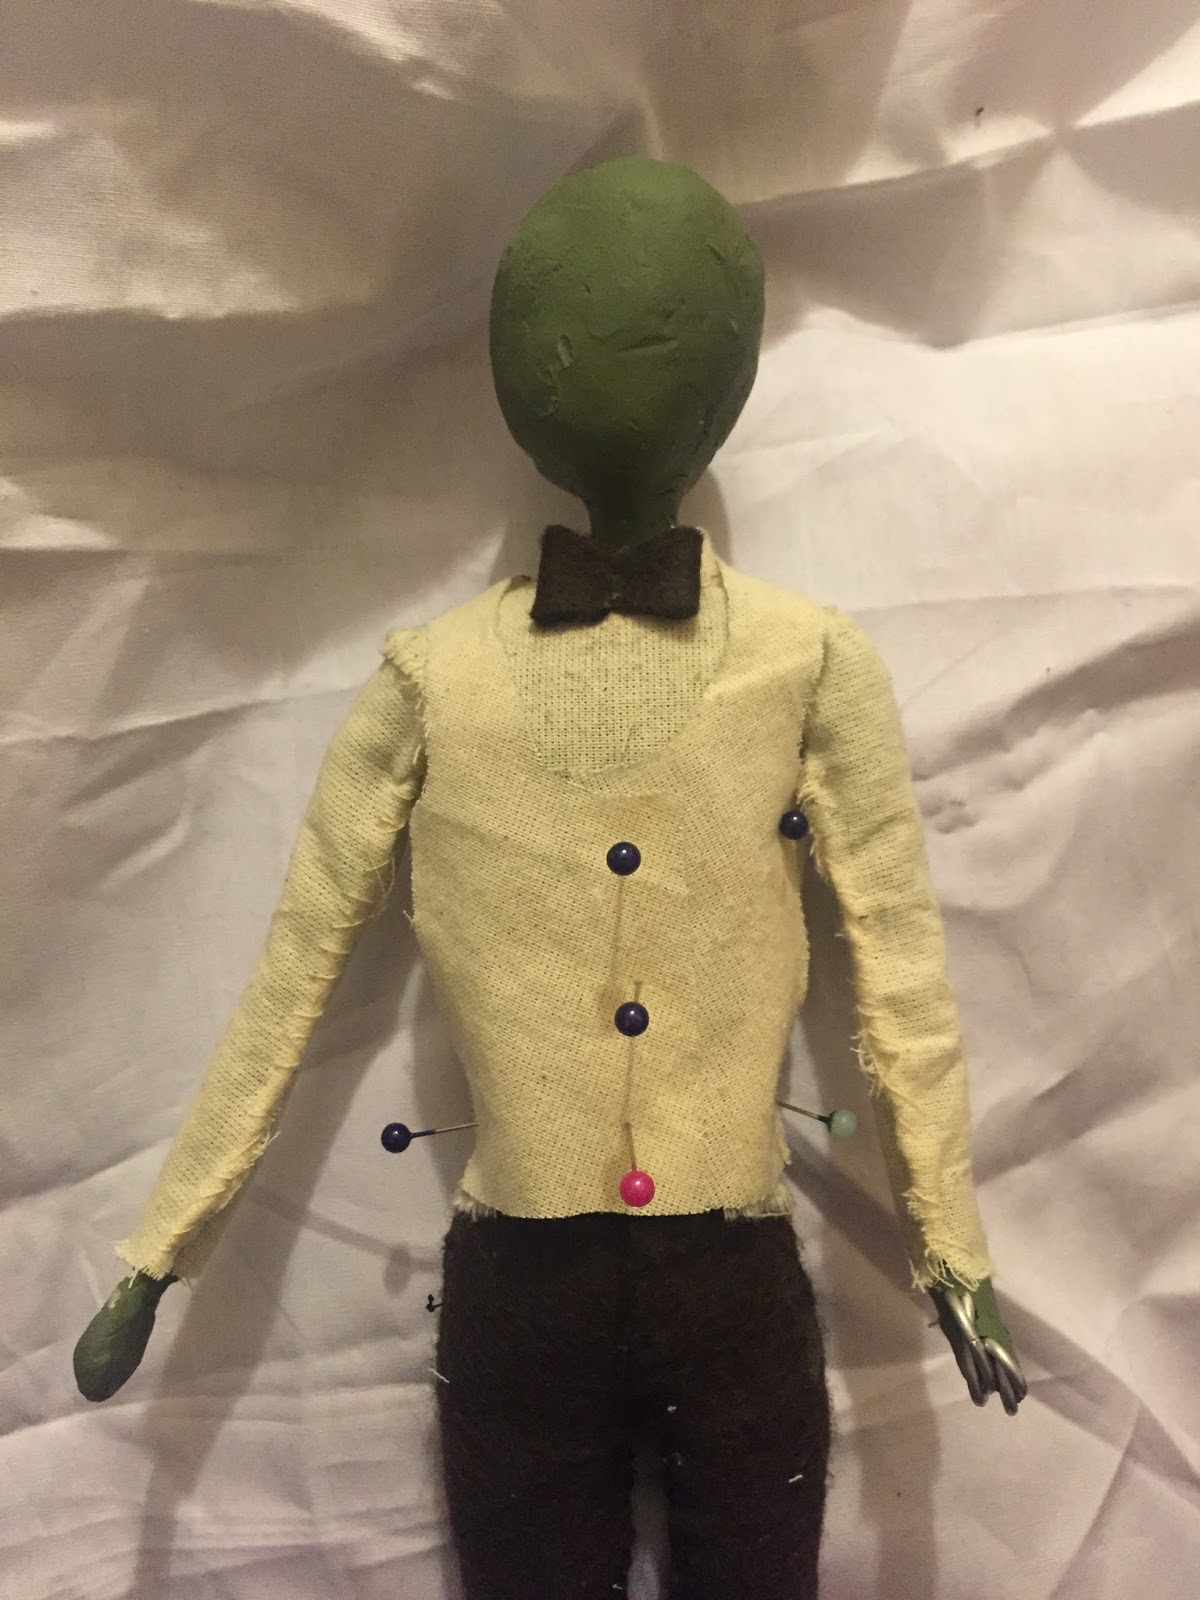
Adding sleeves to the male characters shirt was fiddly as the size was so small so, like for the rest of the outfit, it seemed better to sew it all directly onto him. This means that when both of the characters are done, none of the clothes can be removed. This brings in sustainability, if needed, I could cut the clothing off and re-use the armature but as the metal will likely snap over time. This would not be of any use.
To add the gentleman look to this character, during design I chose a bow tie. This was easy to make as i cut out a long bow shape out of felt. Then folded it inwards to create a 3D realistic bow tie for my model. I also added a collar with the same material as the shirt which was tricks as it wouldn't stay down when being sewed. This is why i glued the centre pieces down. Letting the box sit in-between the bow tie like on a real shirt.
This is a pattern piece found online for a waist coat. I'd never thought about how they were made or put together so this was very interesting to find one so simple. As it has to bend over the shoulders and down his front. I have to do a few tests to make sure the size is correct. This is why i will use a Tulle.
This is a tester to base the actual design on. As the shirt material was cheaper and i have more of it, this is what i shall use.
This is the first test I did for the waistcoat. I found it to be way to small in the back, the front when pulled over the shoulders made it too small and the front panels weren't wide enough.
This is the second where again the front panels weren't wide enough so it would close like a waistcoat will, as they overlap at the front. I will make these changes before the next one is cut out.
This is after testing quite a few failed attempts at the waistcoat. This one sits better on the model and i have pinned it in place to make sure there is enough material to be sewn at either side so it will close properly.
Here is the final waistcoat in the floral brown and black material that i found that would really make the two look like they are from the same era. I have added a top pocket with a handkerchief inside, as well as pockets on either side. Now all i need is a collar to go round the top, like the top of a blazer in design so it looks more finished.
Here is the collar before I glue it to the waistcoat. I would sew it but when sewing curves, lumps and bumps tend to show as it cannot be curved easily as the material doesn't want to be kept in place. Gluing will ensure it sits properly.

This is the finalised male outfit, now all he needs is a face, hands and feet with magnetic bolts so he can stay upright and be able to move. Im very proud of how he has turned out and how the outfit looks. I didn't think I would be able to get it to look like how i wanted becuase of the size but this is what i envisioned when starting to build the models.
For the female, The face has been something i've been avoiding. This is becuase they hold so much emotion and character that I didn't want to ruin the characters that I spent so long building by adding something that didn't look right.
So far i am very proud and pleasantly surprised about the outcome as the paint used for the wounds and black within the nose makes her come to life and look better than i could have hoped she would.
To get the eyes dark and bold, painting beads black works for the pupils as they can stand out as well as stay in place and not be ruined by touching, like plasticine can be dirtied.
To add this other eye, I was very wary of how it could ruin the face and how much emotion I could achieve within the stop motion animation. Yet it turned out looking better than I thought as the black really stands out with the paint but not to a level that looks odd. As the mouth is what will be holding most of the movements, I will be animating the mouth digitally. This is so i can move it without damaging the rest of the face or disfiguring the shape of the head itself.
Making a start on the male, I have done the same as the female and sculpted an indentation for the nose area. As he still has flesh, his comes out more and looks more rough. Then poked holes and added white into the holes before the beads can go in.
These were the beads i've been using for the pupils in the eye before they are painted black.
Now the tree is fully dry, painting it with a rough black undercoat lets me be able to fully cover it with a more brown shade after, Then the colours of the black will show through in places and add depth.
Getting started with the set, I uses thin Plywood with Polystyrene sheets carved on top and glued in place. I came across a problem when using UHU glue for most of this project so when I used is on the Polystyrene, it sunk into it and ate away at it slightly. This is when I chose to use PVA and sellotape it down so i could at least keep the different levels in place and keep them secure. Here is the set before fully being carved, covered and painted.


To start covering it, I used watery PVA and tissue to cover it with some brown and yellow paint mixed in to get an idea of colours i wanted for the overall end result. I really did like this cover colour as it looked dirty and like the ground. Yet i sadly couldn't keep it like this as it was too bright for what was needed for the graveyard.
This just shows the different levels and how thick it is while still being light and manoeuvrable.
Here is where i am up to with the set. I've placed the tree on the hill so i can see what it will look like, which shows its all coming together finally. After asking people what they think of it so far, they think it still needs carving slightly to get more of a rough terrain and not rocky edges like it looks right now. I also spoke to Mat and he brought up an issue I myself had been struggling with. Which is that i have made it quite flat with a path like shape up the centre. This is a slight issue as the background now has to show either the path going somewhere and the background has to be flat.
So when i go back to carving it again, I'll add more of a hill to the bottom left side so it creates a slope, as well as curving the path around the top right level so it can go round a bend. This will make animating the background after, slightly easier.


No comments:
Post a Comment